Product Technical Guides
ZenBench bench installation guide
Correctly installing a ZenBench bench is essential to ensure proper operation of the ventilation system, maintain suitable working conditions, and ensure the performance of the equipment installed on it.
Below, we detail the step-by-step installation process, from receiving the product to the final placement of the instrumentation.
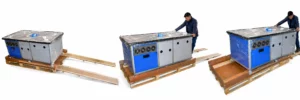
Stage 1: Depalletizing
To remove the bench from the pallet safely:
- Move the pallet to a clear aisle using a pallet truck.
- Cut the strap.
- Remove the lid and the cardboard wrap.
- Release the brakes on the end wheels.
- Place the two ramps next to the pallet.
- Lower the bench carefully.
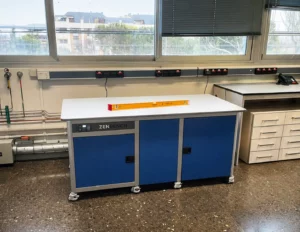
Stage 2: Choose the location
Before installing the bench, it is advisable to review three key aspects:
- Room temperature
- The temperature must be kept between 20°C and 25°C for regulatory compliance (FDA). If it is higher, the ventilation system may not work properly and may cause overheating.
- Available space
- The bench should be placed in a spacious area and not completely against the wall. It is recommended to leave at least 10 cm at the back for hot air exhaust.
- Available power outlet
- A nearby power outlet is required. If it is connected to a UPS, even better.
Stage 3: Bench installation
Once the location has been chosen:
- Move the bench using its wheels.
- Check that doors, corridors, or freight elevators allow passage.
- Position the bench leaving 10 cm from the wall.
- Lock the wheels.
- Level the bench by adjusting the wheels with the help of a level.
Then connect the included power supply to the back of the bench and plug it in.
Ventilation system
Press the green button on the controller.
- The fans start at 20°C.
- They reach maximum power at 35°C.
- The alarm activates progressively at 56°C, 61°C, and 70°C.
- The system has a battery in case of a power outage.
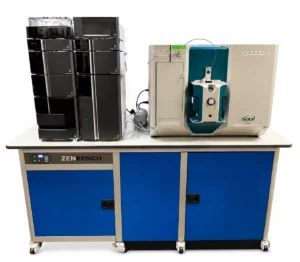
Stage 4: Instrumentation installation
With the bench level and the ventilation switched on:
- Place the equipment centered, leaving about 5 cm of clearance at the edges.
- Place the vacuum pumps in the soundproof compartments.
- Route tubes and cables through the rear grommets.
Final check
The controller temperature should be between 20°C and 40°C.
If the alarm beeps:
- Open the doors to increase air intake.
- Check that all fans are operating.
- If FAIL appears or any fan is not working, contact us.